How the Camera Actually Gets Into Your Sewer Line
The technician doesn't dig or cut pipes to run a camera inspection. They need an access point — usually a cleanout (the capped pipe sticking out of your yard, garage floor, or side of the house), a roof vent, or sometimes a removed toilet if no cleanout exists.
Most Phoenix homes built after 1980 have at least one exterior cleanout near the foundation, often a white or black ABS cap a few inches in diameter. Older homes occasionally lack them entirely, which means creating access through a plumbing fixture.
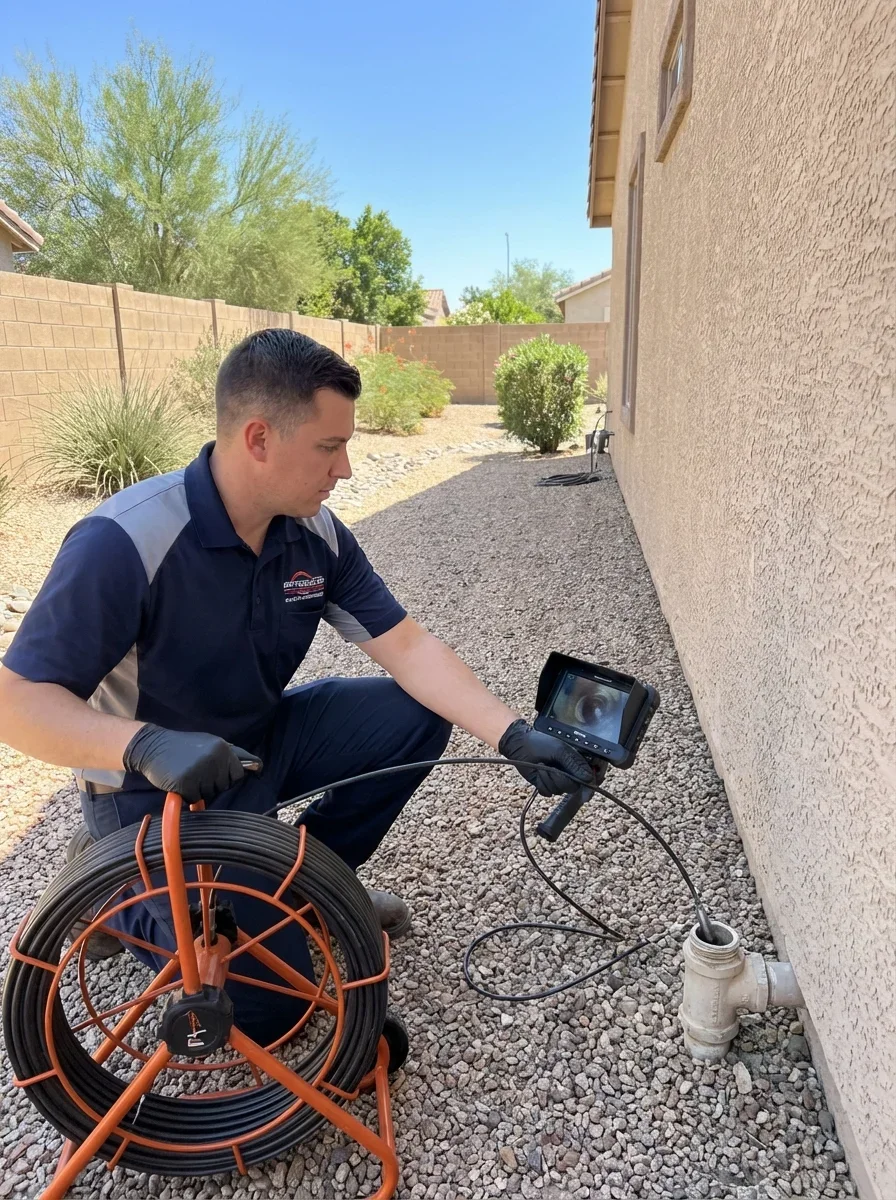
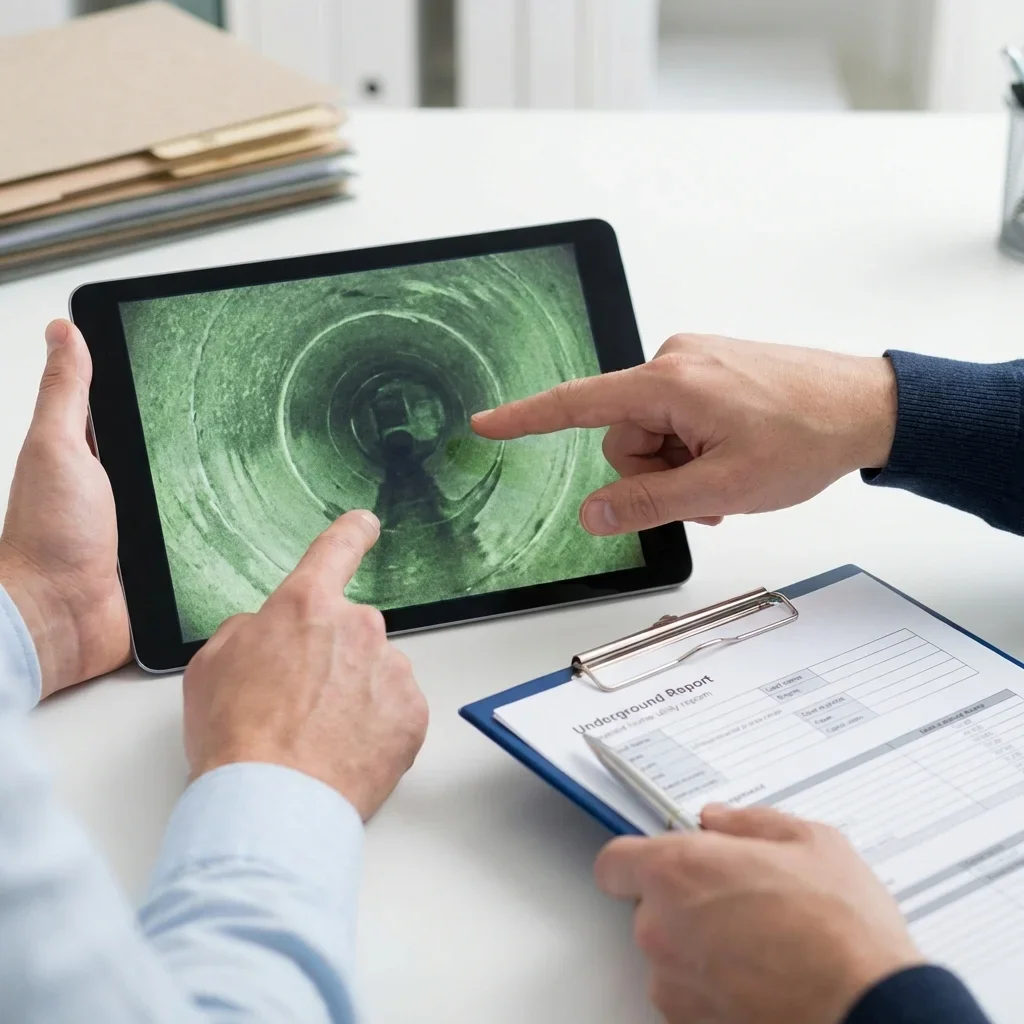
Once they locate the entry point, they remove the cap and insert a flexible cable with a waterproof camera head attached. The camera transmits live video to a monitor the technician watches in real time. You can — and should — watch the feed with them. This isn't a solo operation where they disappear and come back with a verdict.
You're seeing the same cracks, roots, scale buildup, and bellies they're seeing, which makes it much harder to misdiagnose or oversell repairs.
What Happens If There's No Cleanout
If your home predates cleanouts or they've been buried under landscaping, the technician has three options: pull a toilet to access the main drain (adds 15-20 minutes), use a roof vent stack (works for vertical drops but limits lateral pipe visibility), or recommend installing a cleanout before scoping.
Installing a cleanout costs $200-$400 in Phoenix and gives you permanent access for future inspections or drain cleaning. Often worth doing even if it delays the camera work by a day.
What the Technician Is Looking For During the Inspection
The camera doesn't just confirm whether your pipe is broken. It identifies where, what type of damage, and how urgent the fix is.
In Phoenix, that means checking for a specific set of common culprits shaped by Arizona's soil, water, and construction history.
Root intrusion shows up as white or brown tendrils snaking through joints or cracks, especially in pre-2000 homes with clay or cast iron sewer lines. Desert trees like palo verde and mesquite have aggressive roots that seek moisture, and a pinhole leak in a pipe joint is an invitation. The camera catches roots early — before they turn a small crack into a full collapse.
Bellies or sags appear when a section of pipe slopes backward, creating a low spot where water pools instead of draining. You'll see standing water or debris buildup even after a flush. Bellies happen in Phoenix when caliche soil settles unevenly or when contractors backfill poorly during new construction.
Homeowners in San Tan Valley have discovered bellies in brand-new builds, complete with construction debris preventing full camera passage — a problem you'd never detect without video.[1]
Scale and mineral buildup coat the inside of pipes in thick white or tan layers, narrowing the diameter and slowing flow. Phoenix's water averages over 300 ppm calcium carbonate, and that mineral load doesn't just clog your showerhead — it encrusts the inside of older galvanized or cast iron drains.
The camera shows you exactly how much clearance is left.
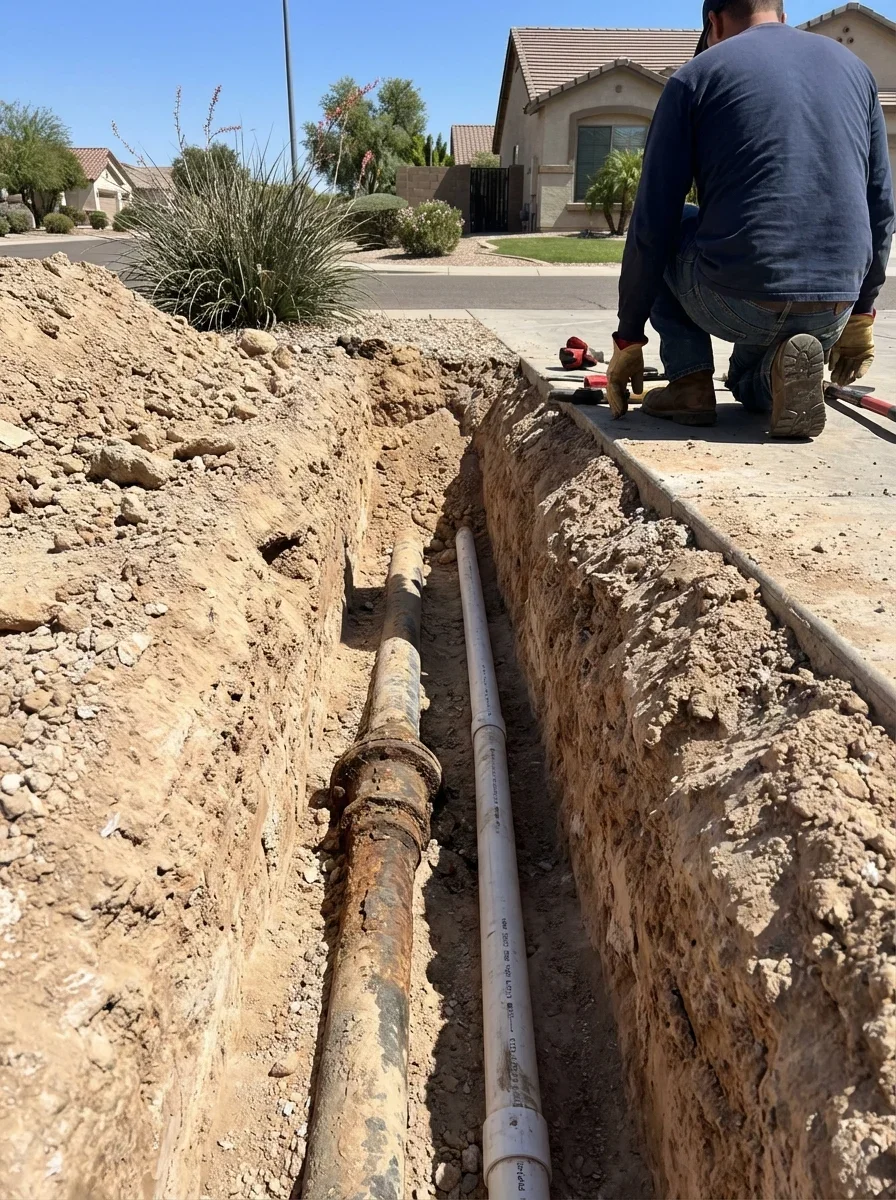
Cracks, offsets, and separations show up as gaps where pipe sections no longer align, often at joints. Offsets let soil and roots enter, eventually causing blockages or collapse.
In a 1978 Glendale home, a camera revealed a large belly and heavy debris just 12 feet from the cleanout, even though the line was ABS — proof that material alone doesn't guarantee a clean pipe.[4]
Construction debris and foreign objects include everything from leftover cement chunks to kids' toys. The camera's caught diapers, grease clumps, and even tools left behind by previous contractors. If your toilet flushes fine but your yard line backs up weekly, debris is a likely suspect.
Grease, Sludge, and Biological Buildup
Kitchen drains and shared lines often show thick grease coatings or slimy biofilm clinging to pipe walls. The camera makes it clear whether your recurring clog is mechanical (roots, bellies) or biological (grease and bacteria).
That distinction matters because hydro jetting clears grease, but it won't fix a sagging pipe.
Common Sewer Problems Camera Inspections Find:
- Root intrusion from palo verde and mesquite trees
- Bellies and sags from caliche soil settling
- Heavy mineral scale from Phoenix's hard water (300+ ppm)
- Pipe offsets and separations at joints
- Construction debris left in new builds
- Grease buildup in kitchen drain lines
The Inspection Process Step-by-Step
Here's what happens once the technician arrives. The whole process runs 30 to 60 minutes for a standard residential inspection of lines 2 inches or larger.[2]
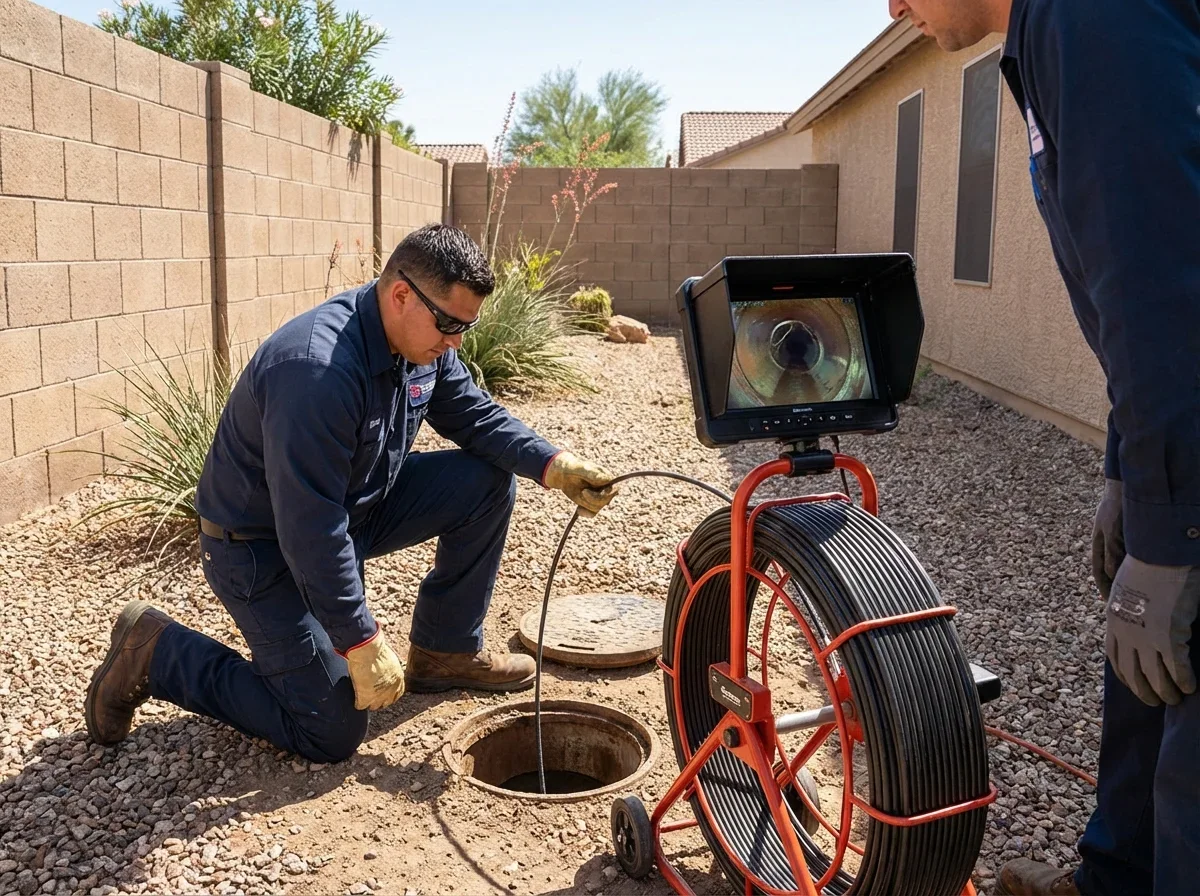
The technician starts by confirming which line you want inspected — main sewer to the street, lateral branch to a specific fixture, or the whole system. They locate the cleanout, remove the cap (sometimes this releases standing water or odor if there's a backup), and prep the camera. Most cameras are LED-lit, waterproof, and mounted on a flexible push-rod that can navigate bends.
They insert the camera slowly, watching the monitor for real-time feedback. You'll see the pipe interior scroll past on screen — joints, turns, material changes. They pause at anything unusual, mark the distance from the cleanout (cameras have footage counters), and explain what you're seeing.
If they hit a blockage, they note its location and either push gently to see if it's temporary debris or stop to avoid damaging the camera.
Running water during the inspection helps. Flushing a toilet or running a faucet while the camera's in the line reveals whether water drains freely or pools in bellies. Some technicians test this deliberately to check for solid connections in crisscross Y-style cleanouts or to highlight debris that only shows up under flow.[1]
Once they've scanned the full accessible length — usually to the property line or until a blockage stops progress — they retract the camera, rinse it, and review findings with you on the spot. Good contractors provide a digital video file and a written report detailing distances, damage types, and repair recommendations.
You're not guessing what happened underground. You're watching the evidence.
What If the Camera Can't Go the Full Distance?
Heavy blockages, very small branch lines (under 2 inches), or collapsed sections can stop a camera inspection short. In those cases, the technician will note the obstruction's location and recommend clearing the line first (via snaking or hydro jetting) before re-scoping.
Older homes sometimes have crisscross cleanouts that complicate camera navigation, making it harder to get a full view without accessing multiple entry points.[2]
What the Results Actually Tell You
The video isn't just a visual novelty. It's a diagnostic tool that separates minor maintenance from urgent sewer line repair.
Here's how to interpret what you see and what action (if any) makes sense.
Minor issues include light root intrusion at joints, small cracks that aren't leaking, or thin grease/scale coatings. These don't require immediate repair, but they do suggest monitoring the line annually and scheduling preventive jetting to keep buildup from worsening.
If you're buying a home and the camera shows minor roots, that's a negotiating point. Not necessarily a dealbreaker.
Moderate issues include bellies with standing water, significant root masses, moderate offsets, or heavy scale reducing pipe diameter by 30-50%. These problems cause recurring clogs and slow drains, but the pipe isn't collapsing yet. Repair timelines range from "within 6 months" to "before the next monsoon season," depending on severity.
Hydro jetting often clears roots and scale temporarily, buying you time to budget for trenchless relining or spot repairs.
Urgent issues include collapsed sections, large separations with visible soil intrusion, pipes shifted off-grade by more than a few inches, or total blockages that won't clear. These demand immediate repair to avoid sewage backups into your home or flooding your yard.
In Phoenix, caliche soil and settling make collapses more common in pre-1980 homes, especially if original cast iron or clay pipes were never replaced.
Partial Replacements and Hidden Liabilities
Some Glendale homeowners discovered that prior owners replaced sewer lines around the house but left the section running to the street untouched — including deteriorating Orangeburg pipe that only a camera inspection revealed.[3]
If you're buying or selling, confirm the entire line has been scoped, not just the accessible first 20 feet. Partial work leaves you exposed to expensive failures down the road.
| Issue Severity | What You'll See | Repair Timeline | Typical Solution |
|---|---|---|---|
| Minor | Light roots, hairline cracks, thin scale | Annual monitoring | Preventive hydro jetting |
| Moderate | Bellies with standing water, 30-50% blockage, root masses | 3-6 months | Hydro jetting + trenchless relining |
| Urgent | Collapsed sections, large separations, complete blockage | Immediate | Excavation or pipe bursting replacement |
Why You'd Schedule a Sewer Camera Inspection
Most Phoenix homeowners request a camera inspection in three scenarios: pre-purchase due diligence, diagnosing recurring clogs, or verifying completed repairs.
Pre-purchase inspections are the single best investment before closing on a resale home. Standard home inspections don't include sewer scopes, so you're buying blind unless you pay $200-$400 for a dedicated camera run.
That scope catches bellies, roots, and old pipe materials that will cost thousands to fix after you own the house. Even newer homes aren't immune — San Tan Valley buyers have found construction debris and installation errors in brand-new builds that prevented full inspections and risked future backups.[1]
Recurring clogs that snaking doesn't solve often hide mechanical problems a camera reveals in minutes. If you're calling for drain cleaning every few months, you're treating symptoms.
The camera shows you the cause — whether it's roots, grease, a belly, or a stuck object — so you can fix the real problem instead of renting a snake forever.[5]
Post-repair verification ensures contractors did the work they invoiced. After a trenchless liner installation, pipe replacement, or major root removal, a follow-up scope confirms the line is clear, properly graded, and sealed.
Cheap insurance against shoddy work, and reputable contractors offer it as part of their warranty process.
When DIY Diagnosis Fails
Unexplained sewage odors, gurgling drains, or slow fixtures often stump even experienced DIYers. Without a camera, you're guessing whether the problem is a vent stack issue, a partial clog, or a cracked pipe 50 feet from the house.
The video removes the guesswork, which saves you from throwing money at fixes that don't address the root cause.
What a Sewer Camera Inspection Costs in Phoenix
Pricing varies by line length, accessibility, and whether the inspection is standalone or bundled with other services. Expect to pay $200-$400 for a standard residential main sewer inspection in the Phoenix metro area.
Longer runs to the street (100+ feet), multiple branch lines, or difficult access points (roof vents, buried cleanouts) push costs toward the higher end.
Some contractors bundle camera inspections with hydro jetting or repair estimates, reducing or waiving the inspection fee if you proceed with recommended work. Others charge flat rates regardless of findings. Ask upfront whether the fee is credited toward repairs and whether you'll receive a digital copy of the video and written report.
You paid for diagnostic evidence. You should own it.
Free "second opinion" scopes have saved Phoenix homeowners thousands by confirming accurate diagnoses before committing to expensive repairs.[6] If a contractor quotes $8,000 to replace your entire sewer line based on a verbal description, spending $300 on an independent camera inspection from a different company can verify whether the damage is really that extensive or if a $1,500 spot repair would suffice.
What You Should Receive for the Cost
A legitimate inspection includes live video you can watch, a recorded digital file (usually emailed or provided on USB), a written report noting footage distances and damage types, and an on-site walkthrough explaining findings.
If a contractor disappears with the camera, comes back 20 minutes later, and verbally tells you "you need a new line" without showing evidence, find someone else. Transparency is the whole point of a camera inspection.
Pro Tip: Never accept a sewer line replacement quote without seeing the camera footage yourself. The video is your evidence — if a contractor won't share it, they're hiding something or they never actually ran the camera properly.
How to Interpret the Video and Report
You don't need to be a licensed plumber to understand sewer camera footage, but you do need to know what normal looks like. A healthy pipe appears smooth, round, and free of standing water (except immediately after a flush).
Joints show as slight rings where sections connect, but they shouldn't gap or separate. The camera moves smoothly without hitting obstructions.
Red flags on video include:
- Visible cracks running lengthwise or around the pipe circumference
- Offsets where pipe sections don't align, creating a "step" the camera bumps over
- White root tendrils or thick root masses blocking part of the pipe
- Standing water or debris in sections that should drain clear
- Discoloration, rust, or corrosion eating through pipe walls
- Bellies where the camera dips down and water pools
The written report should list each issue with footage distance (e.g., "root intrusion at 42 feet"), material type if it changes mid-line, and recommended action. Some reports include screenshots or still frames marking damage.
If the report says "line needs replacement" without specifying where or why, ask for clarification. Vague recommendations are a warning sign.
Questions to Ask After Seeing the Results
- Where exactly is the damage, and how many feet of pipe need repair?
- Is this a spot repair candidate, or does the whole line need replacement?
- What caused the problem — soil settling, roots, age, installation error?
- How long can I wait before this becomes an emergency?
- Can hydro jetting or trenchless repair fix this, or is excavation required?
If the contractor pressures you to decide on the spot or dismisses questions, that's your cue to get a second opinion. The video exists specifically so you can get other bids and informed perspectives.
Combining Camera Inspections With Other Services
Sewer scopes often pair with hydro jetting, especially if the camera reveals grease, scale, or light root buildup. Jetting clears the line, then a follow-up scope confirms everything's gone and checks for hidden damage that was obscured by debris.
This combo is standard when diagnosing recurring clogs — you fix the symptom (blockage) and identify the cause (roots, bellies, cracks) in one visit.
Pre-jetting inspections prevent wasting money. If the camera shows a collapsed section or large offset, jetting won't help — you need a structural repair.
Running the camera first avoids throwing $400 at hydro jetting when the real fix costs $3,000.
Post-repair scopes verify work quality. After trenchless lining, pipe bursting, or traditional excavation and replacement, a camera confirms the new pipe is properly aligned, sealed, and clear of installation debris. Some contractors include this in their contract; others charge separately.
Either way, demand it. Repair warranties mean little if you can't prove the work was done correctly.
When to Scope Lateral Lines vs. Main Sewer
The main sewer line runs from your house to the street or septic tank — the big pipe everything drains into. Lateral branch lines connect individual fixtures (toilets, showers, washing machines) to the main.
If one toilet backs up but others work fine, scope the lateral first. If everything backs up simultaneously, the main sewer is the culprit.
Good technicians clarify which line you're inspecting before starting, because scoping the wrong one wastes time and money.
What to Do With the Information You Get
Camera footage gives you leverage and clarity, but only if you use it strategically. After the inspection, you'll have a video file, a written report, and recommendations.
Here's what to do next.
If you're buying a home, send the report to your real estate agent and request a seller credit or repair before closing. Sewer repairs aren't cosmetic — they're structural and expensive. A $5,000 line replacement discovered pre-purchase is a reasonable negotiating point.
If the seller refuses, you know exactly what you're signing up for and can budget accordingly.
If you're diagnosing recurring problems, use the footage to get multiple repair quotes. Share the video and report with at least two ROC-licensed contractors (verify at roc.az.gov) and compare their proposed solutions.
One might suggest trenchless relining at $4,000 while another quotes full excavation at $8,000 for the same section of pipe. The video keeps everyone honest.
If you're verifying repairs, compare the post-repair footage to the original inspection. The new pipe should be smooth, properly graded, and free of debris.
If you see the same belly or roots after a contractor claimed to fix them, you have documented proof to dispute the bill or demand a redo.
Avoid Common Misinterpretations
Not every crack requires replacement. Hairline surface cracks in concrete pipes that aren't leaking or letting roots in are cosmetic. Similarly, minor bellies (less than an inch of sag) in otherwise functional pipes might not justify a $6,000 repair if you're not experiencing backups.
The camera shows you what's there. A good plumber helps you prioritize what actually matters.
If someone uses the footage to scare you into unnecessary work, get a second opinion.
Special Considerations for Phoenix Sewer Lines
Phoenix's climate, soil, and construction history create unique sewer line challenges a camera inspection reveals better than any other diagnostic method.
Caliche soil shifts and settles unpredictably, especially during monsoon season when dry hardpan suddenly absorbs water and expands. That movement cracks rigid pipes and creates bellies in lines that were perfectly graded when installed.
A camera catches these shifts early, before a minor sag turns into a collapsed section. Because caliche makes excavation expensive (2-3x normal soil costs), knowing the exact location and length of damage helps you budget accurately and consider trenchless repairs that avoid digging through hardpan.
Hard water scale coats the inside of older cast iron and galvanized drains, narrowing flow and creating rough surfaces that snag debris. Phoenix's 300+ ppm calcium carbonate water is aggressive, and a camera shows you how much clearance you've lost.
If the pipe's half-clogged with mineral buildup, jetting restores flow temporarily, but repiping to PVC or ABS solves the problem permanently.
Pre-1980 cast iron and clay pipes are common in Phoenix's older neighborhoods. Both materials crack and corrode over time, especially where joints separate. The camera identifies which sections are failing so you can replace just those zones rather than the entire line.
Some Glendale homes have mixed materials — ABS around the house, Orangeburg or clay to the street — and only a camera reveals where transitions occur.[3]
Slab-on-grade construction means your sewer lines often run under the concrete foundation before exiting to the yard. If the camera reveals a problem under the slab, you're looking at either breaking concrete to access the pipe or trenchless methods that reline from the inside.
Knowing the problem's location before breaking concrete saves you from demolishing the wrong section of your garage floor.
When NOT to Schedule a Camera Inspection
Camera inspections are powerful diagnostic tools, but they're not always necessary or useful. If you've never had a backup, your drains run fast, and you're not buying or selling the house, there's no reason to scope the line.
Preventive inspections every 10-15 years make sense for older homes or if you've had prior sewer work, but annual scopes are overkill unless you've got documented recurring issues.
If a known blockage needs immediate clearing, clear it first, then scope. Running a camera into a completely clogged line just confirms "yes, it's clogged" without showing you what's beyond the blockage.
Snake or jet the line, restore flow, then inspect to see if roots, bellies, or damage caused the clog in the first place.
Very small diameter branch lines (under 2 inches) may not accommodate standard camera heads. If you're troubleshooting a 1.5-inch bathroom sink drain, a scope might not be physically possible.
In those cases, other diagnostics (water testing, smoke testing, or just replacing the accessible section) are more practical.
If the line is already scheduled for full replacement, a pre-demo camera inspection doesn't add value. You're tearing it out anyway — save the $300 and put it toward the new pipe.
Choosing a Contractor for the Inspection
Not all sewer camera inspections are equal. The quality of the camera, the technician's experience, and the thoroughness of the report vary wildly across Phoenix plumbing companies.
Look for ROC-licensed contractors with active residential plumbing credentials. Verify their license at roc.az.gov before scheduling. Arizona's ROC bond is only $4,000-$15,000 depending on license type, so also confirm they carry general liability insurance and workers comp (not legally required in Arizona, but a red flag if they don't).
Ask about camera quality. HD cameras with LED lighting and distance counters produce usable footage. Older analog cameras with poor resolution make it hard to spot hairline cracks or early root intrusion.
You're paying for diagnostic clarity. Demand equipment that delivers it.
Insist on live viewing and a digital copy. You should watch the inspection in real time and receive the video file afterward. Some contractors only provide a verbal summary, which gives you no recourse if you later question their recommendations.
The footage is evidence. You own it.
Expect transparent pricing. Flat-rate inspections are common ($200-$400 for standard residential lines). If a contractor quotes "starting at $99" but charges hidden fees for footage, reporting, or longer lines, that's bait-and-switch.
Get the total cost upfront, in writing, including what's included (video file, written report, on-site review).
Check reviews for honesty. Homeowners consistently praise contractors who provide second opinions, explain findings without pressure, and offer multiple repair options with honest trade-offs.[6]
If reviews mention high-pressure sales tactics or diagnoses that don't match independent inspections, keep looking.